The Graph
Getting historical data on a smart contract can be frustrating when building a dapp. The Graph (opens in a new tab) provides an easy way to query smart contract data through APIs known as subgraphs. The Graph’s infrastructure relies on a decentralized network of indexers, enabling your dapp to become truly decentralized.
Quick Start
These subgraphs only take a few minutes to set up. To get started, follow these three steps:
- Initialize your subgraph project
- Deploy & Publish
- Query from your dapp
Here’s a step by step walk through:
1. Initialize your subgraph project
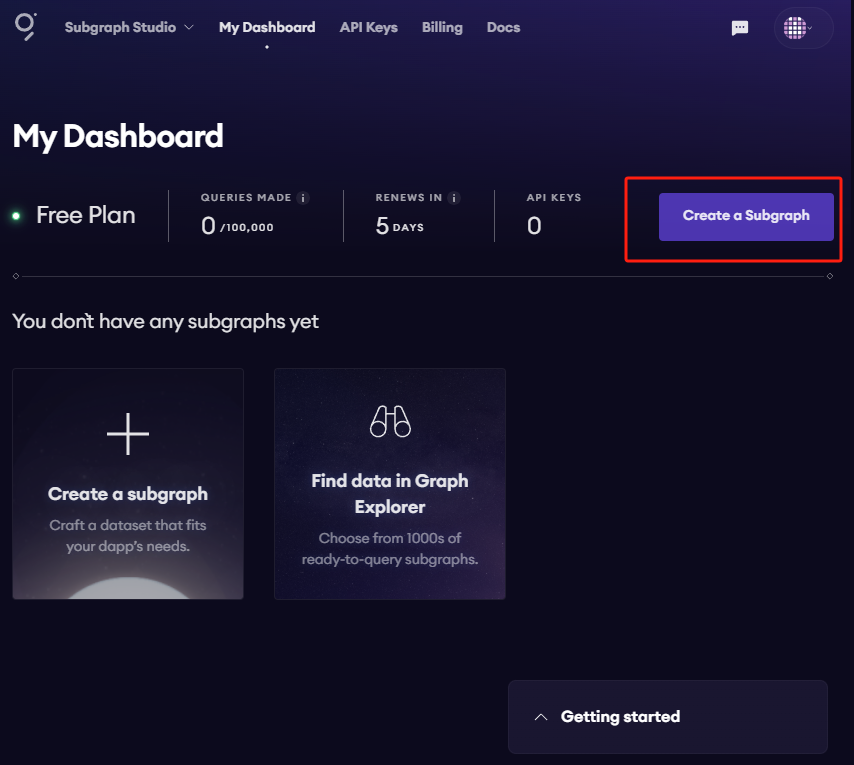
Create a subgraph on Subgraph Studio
Go to the Subgraph Studio (opens in a new tab) and connect your wallet. Once your wallet is connected, you can begin by clicking “Create a Subgraph”. When choosing a name, it is recommended to use Title Case: “Subgraph Name Chain Name.”
You will then land on your subgraph’s page. All the CLI commands you need will be visible on the right side of the page:
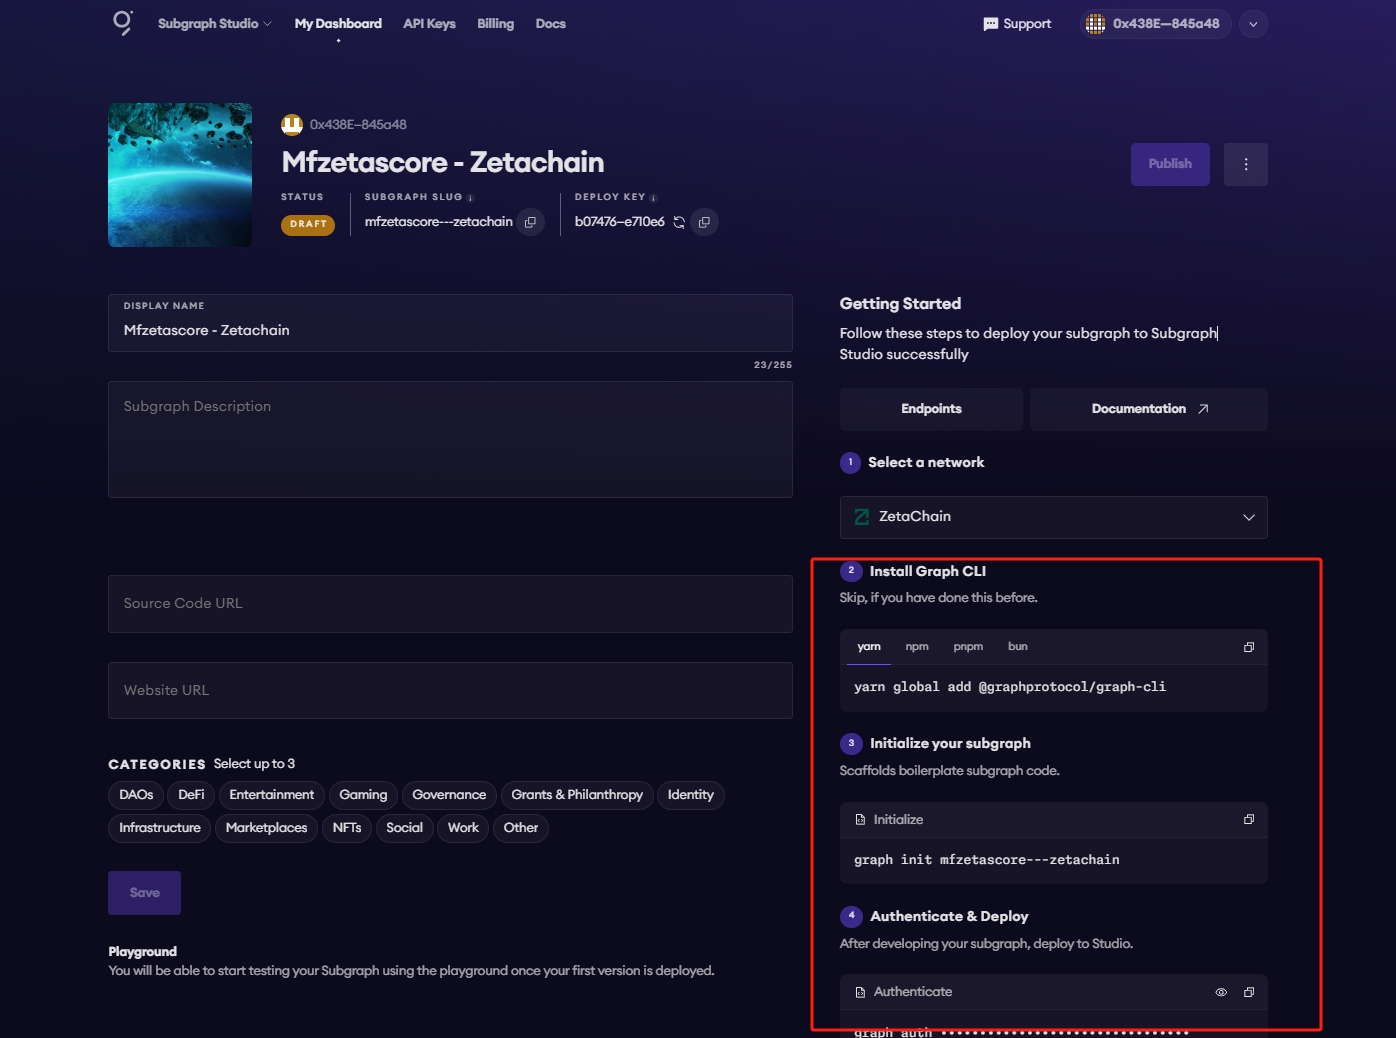
Install the Graph CLI
On your local machine run the following:
npm install -g @graphprotocol/graph-cliInitialize your Subgraph
You can copy this directly from your subgraph page to include your specific subgraph slug:
graph init --studio <SUBGRAPH_SLUG>You’ll be prompted to provide some info on your subgraph like this:
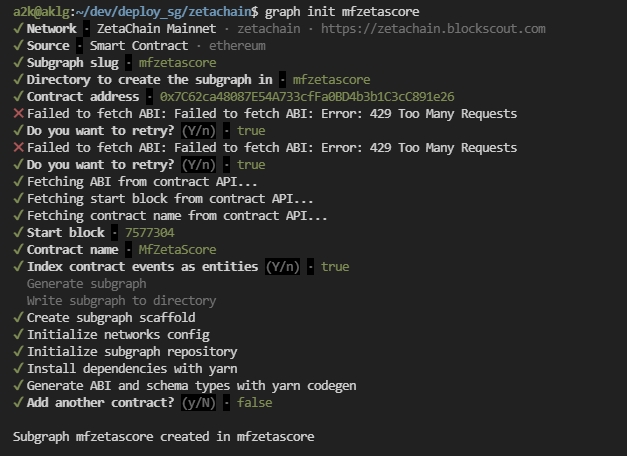
Simply have your contract verified on the block explorer and the CLI will automatically obtain the ABI and set up your subgraph. If it fails to fetch ABI or other info, simply retrying will usually resolve the problem.
2. Deploy & Publish
Deploy to Subgraph Studio
First run these commands:
$ graph codegen
$ graph build
Then run these to authenticate and deploy your subgraph. You can copy these commands directly from your subgraph’s page in Studio to include your specific deploy key and subgraph slug:
$ graph auth --studio <DEPLOY_KEY>
$ graph deploy --studio <SUBGRAPH_SLUG>
You will be asked for a version label. You can enter something like v0.0.1, but you’re free to choose the format.
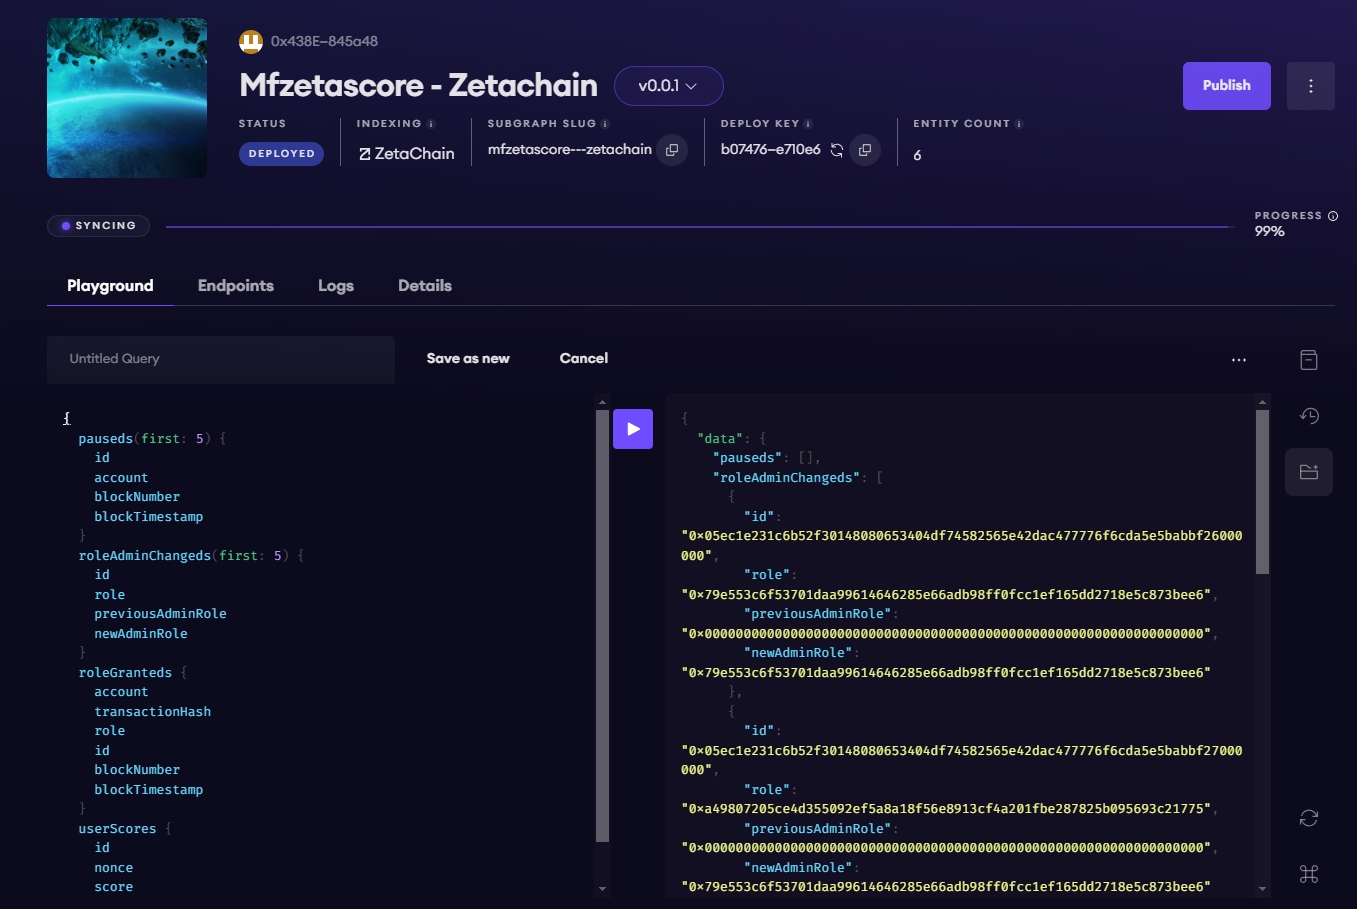
Test your subgraph
You can test your subgraph by making a sample query in the playground section. The Details tab will show you an API endpoint. You can use that endpoint to test from your dapp.
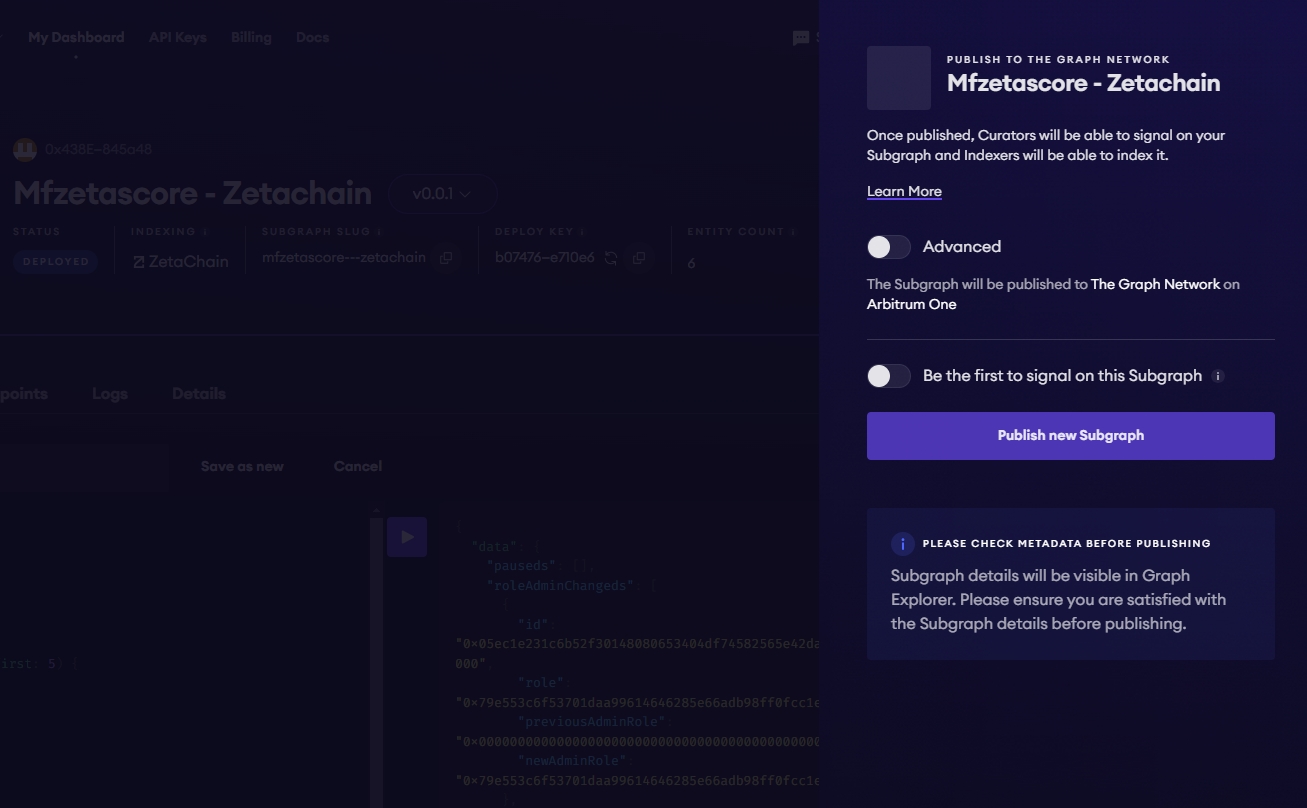
Publish Your Subgraph to The Graph’s Decentralized Network
Once your subgraph is ready to be put into production, you can publish it to the decentralized network. On your subgraph’s page in Subgraph Studio, click on the Publish button:
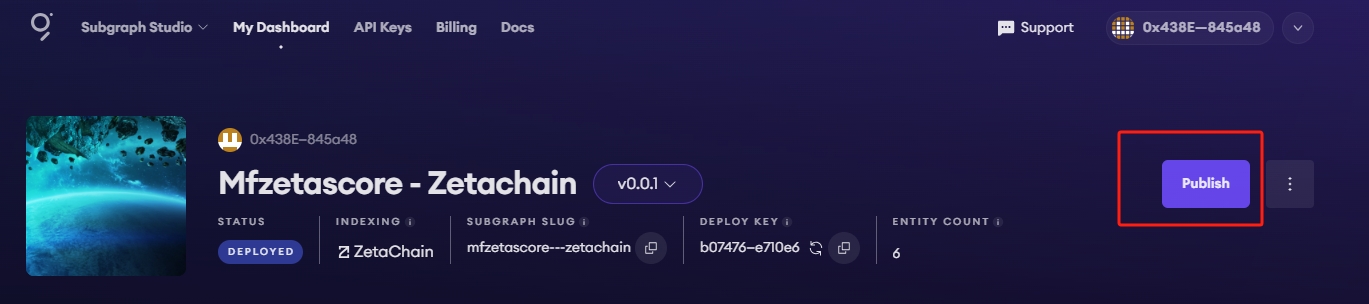
You'll need some ETH on Arbitrum One to create an on-chain transaction. The Graph's smart contracts are all on Arbitrum One, even if your subgraph is indexing data from another chain.
Note: When publishing, a "Partial Indexer Support" alert means subgraphs on this chain are indexed by The Graph's default indexer but not by independent indexers. Testnets always have this limitation. For mainnets, this warning will go away after a voting process enables indexer rewards for the chain, at which point you can attract multiple indexers to your subgraph.
3. Query your Subgraph
Congratulations! You can now query your subgraph on the decentralized network!
For any subgraph on the decentralized network, you can start querying it by passing a GraphQL query into the subgraph’s query URL which can be found at the top of its Explorer page.
Here’s an example from the CryptoPunks Ethereum subgraph (opens in a new tab) by Messari:
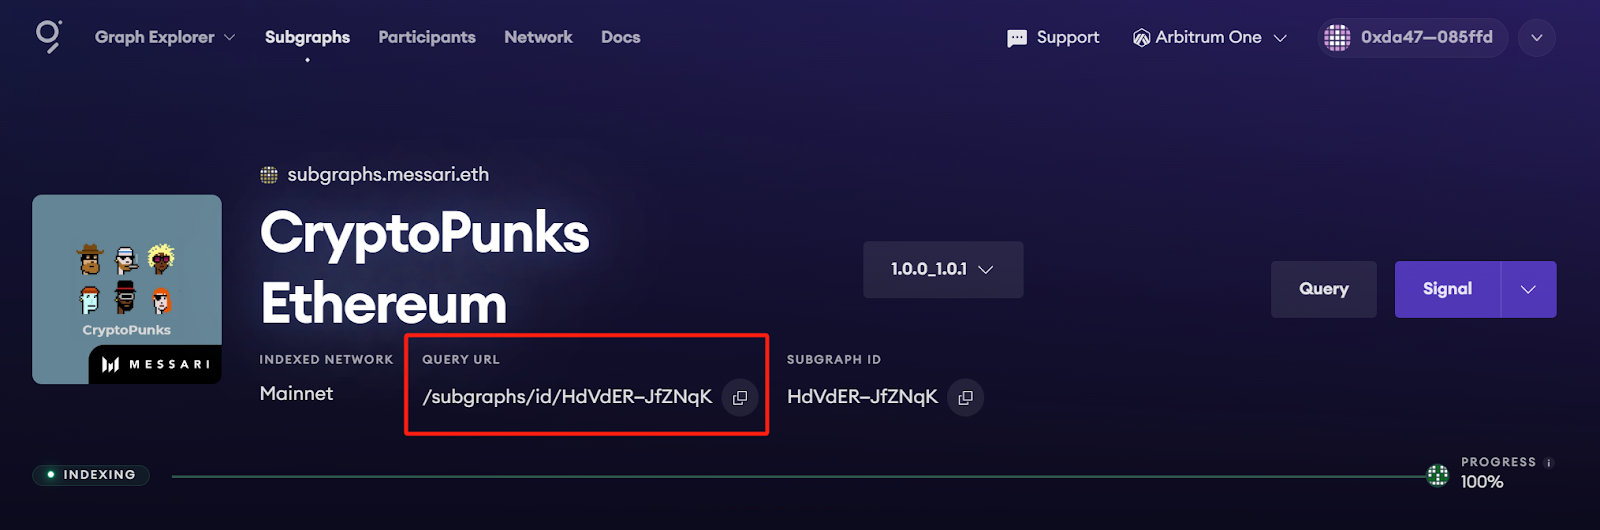
The query URL for this subgraph is:
https://gateway-arbitrum.network.thegraph.com/api/[api-key]/subgraphs/id/HdVdERFUe8h61vm2fDyycgxjsde5PbB832NHgJfZNqK
Now, you simply need to fill in your own API Key to start sending GraphQL queries to this endpoint.
Getting your own API Key
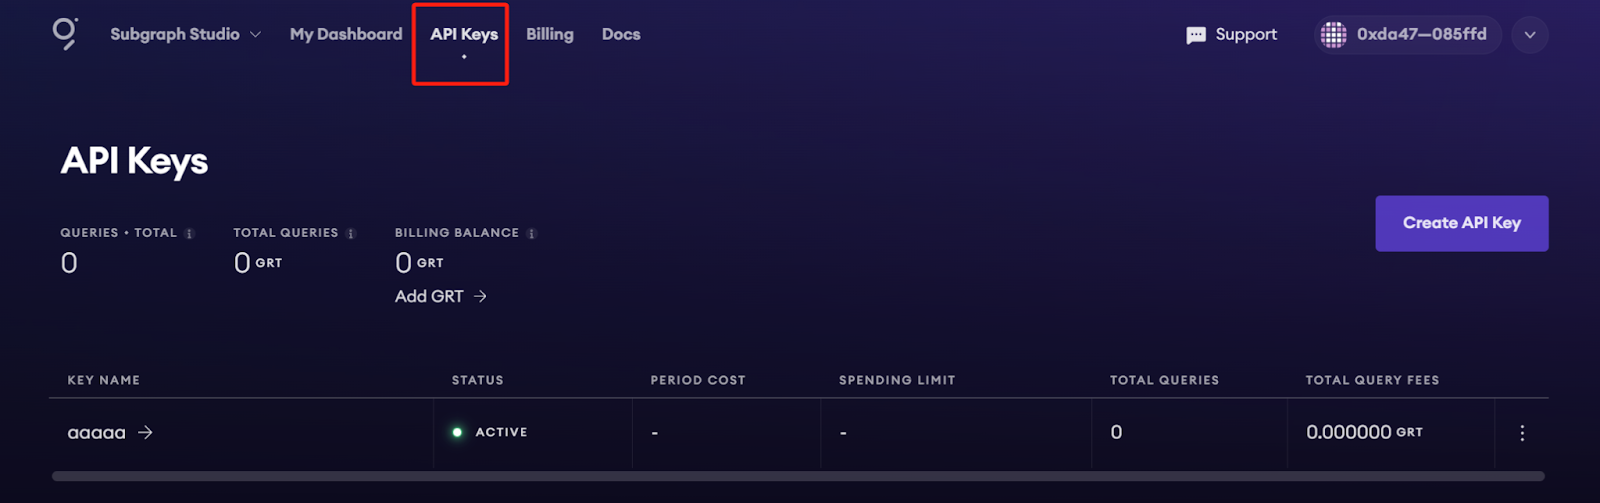
In Subgraph Studio, you’ll see the “API Keys” menu at the top of the page. Here you can create API Keys.
Appendix
Sample Query
This query shows the most expensive CryptoPunks sold.
{
  trades(orderBy: priceETH, orderDirection: desc) {
    priceETH
    tokenId
  }
}
Passing this into the query URL returns this result:
{
  "data": {
    "trades": [
      {
        "priceETH": "124457.067524886018255505",
        "tokenId": "9998"
      },
      {
        "priceETH": "8000",
        "tokenId": "5822"
      },
// ...Sample code
const axios = require('axios');

const graphqlQuery = `{
  trades(orderBy: priceETH, orderDirection: desc) {
    priceETH
    tokenId
  }
}`;
const queryUrl = 'https://gateway-arbitrum.network.thegraph.com/api/[api-key]/subgraphs/id/HdVdERFUe8h61vm2fDyycHgxjsde5PbB832NHgJfZNqK'

const graphQLRequest = {
  method: 'post',
  url: queryUrl,
  data: {
    query: graphqlQuery,
  },
};

// Send the GraphQL query
axios(graphQLRequest)
  .then((response) => {
    // Handle the response here
    const data = response.data.data
    console.log(data)

  })
  .catch((error) => {
    // Handle any errors
    console.error(error);
  });
Additional resources:
- To explore all the ways you can optimize & customize your subgraph for a better performance, read more about creating a subgraph here (opens in a new tab).
- For more information about querying data from your subgraph, read more here (opens in a new tab).